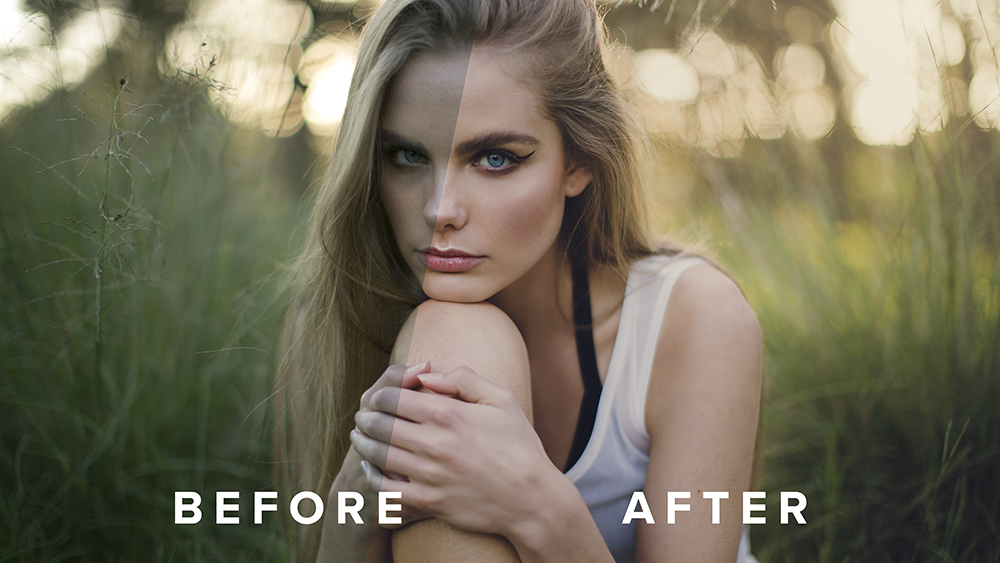
In today’s tutorial, we’re going to go through a few basic portrait retouching Photoshop Tools. These include:
- Healing Brush Tool
- Clone Stamp Tool
- Dodge Tool
- Burn Tool
Each of these tools are essential for portrait retouching in Photoshop, so we’re going to go through an explain what each one is, what they do and how you can use them to reach the next level in your retouching.
01. Healing Brush Tool // The Healing Brush Tool is an extremely powerful tool in Photoshop. You can use it to remove blemishes from the skin, wrinkles, stray strings on fabric, scratches, dust, distractions, pretty much anything! To find the Healing Brush, you can click on the bandaid icon in Photoshop’s Tool Module or you can tap the shortcut “J”. There are two different Healing Brushes including the original Healing Brush Tool and the Spot Healing Brush Tool. Both work in similar ways. We are going to focus on the Healing Brush Tool first.
Before we can start using this tool, we need to understand how it works first. The Healing Brush Tool takes a sample from another part of the image which you can then use to paint over the section of image you want to repair. The tool then blends in your selection causing it to disappear into the surrounding image. The Healing Brush Tool does this by matching the texture, lighting, transparency and shading of your sampled selection allowing it to blend seamlessly into the image.
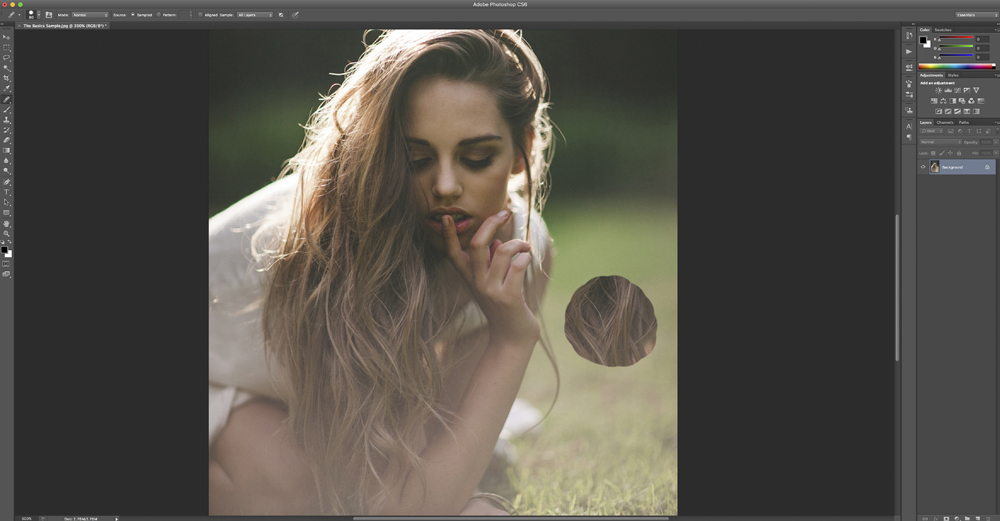
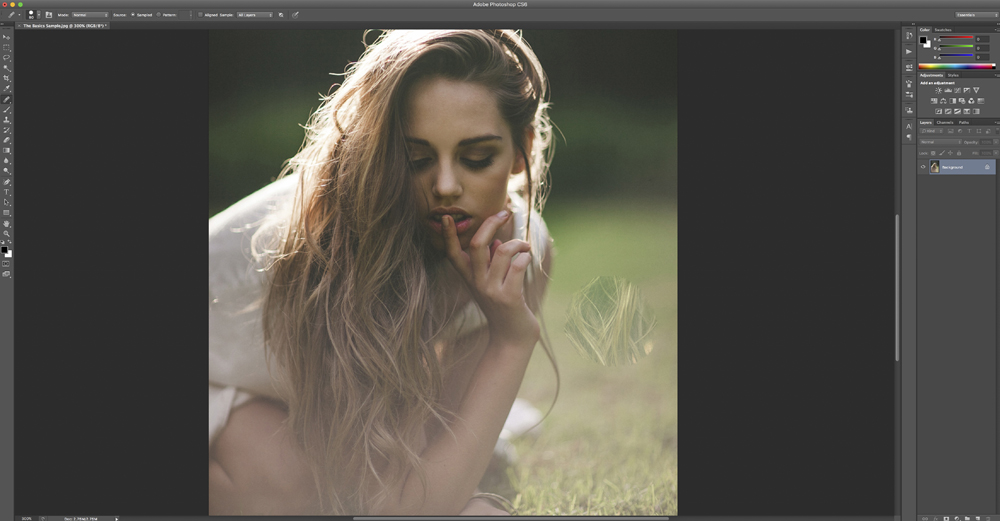
You can see how the Healing Brush Tool works below. We selected a sample (by Alt + clicking on a particular area) from the model’s hair and painted it into the grass. Can you see how at first the new area of hair in the grass looks exactly the same as the hair we sampled from? As soon as we let go of the mouse, the Healing Brush Tool gets to work to start blending the painted area. We can now see that the hair has a transparent look and the colour is matching its surroundings.
The hair doesn’t blend in perfectly with it’s surroundings as we are just using this as an obvious example to show you how the Healing Brush works. In a real retouching situation if you were to for example remove a pimple from someone’s face, you would use a small brush sampling from a clean section of skin and brushing over just the pimple or item you are trying to remove.
As we mentioned before, this tool also has a variation in the Spot Healing Brush Tool. This tool works in very much the same manner, however instead of sampling yourself, the tool automatically samples from around the area you are retouching.
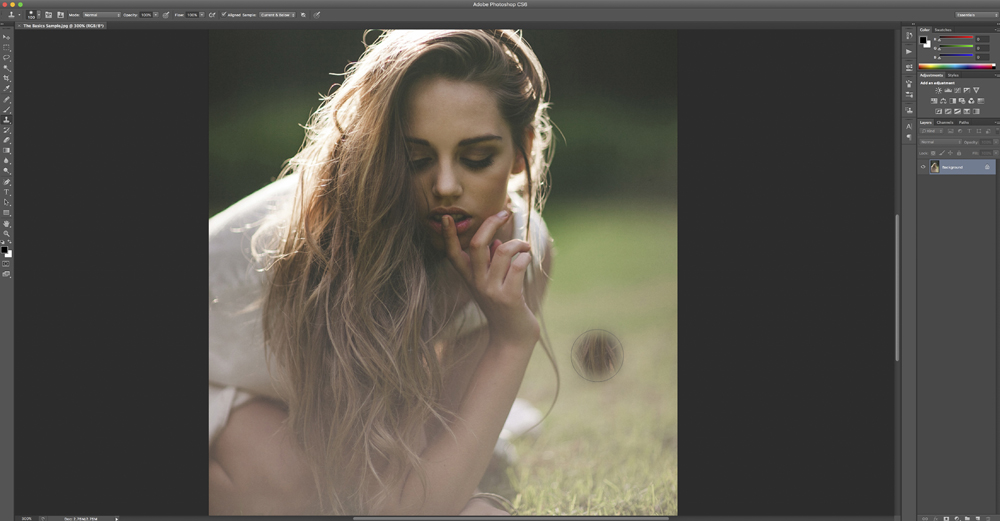
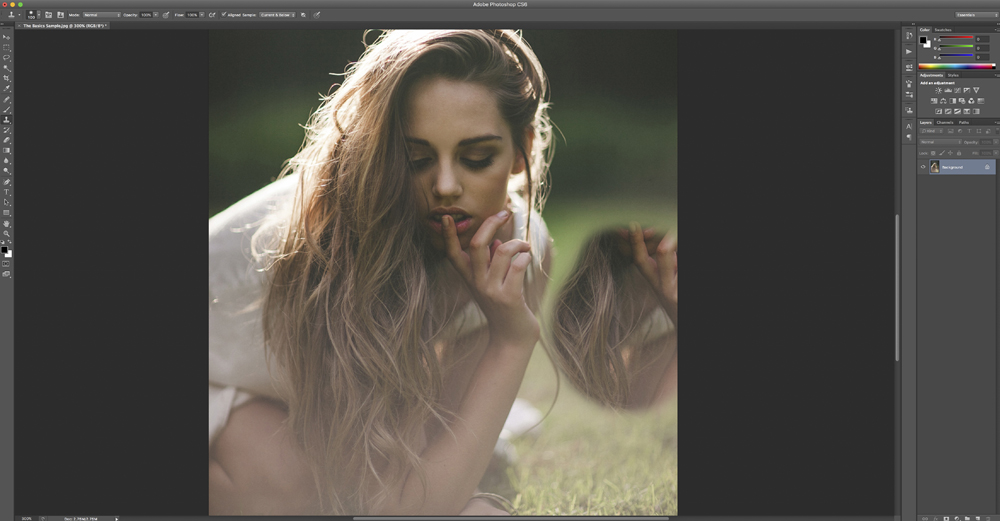
02. Clone Stamp Tool // The Clone Stamp Tool is similar to the Healing Brush Tool in that you Alt+click an area you want to sample from and then brush the sample into another area of the image. Unlike the Healing Brush, the Clone Stamp Tool doesn’t match the texture, lighting, transparency or shading of your sampled selection, instead it’s paints in the pixels as they are. This tool is useful for duplicating objects or removing objects entirely. You can also use it to paint part of one layer onto a different layer. Take a look at the example images below to see how the Clone Stamp Tool works.
The Clone Stamp Tool can be used in combination with the Healing Brush to smooth out sharp edges left by the healing brush in intricate retouching situations. I’ve touched on this subject on various of my previous tutorials such as this and this one.
03. Dodge Tool // The Dodge Tool in Photoshop works to lighten an area of your image. Applying the Dodge Tool to the original image layer permanently alters the image information. To use the Dodge Tool on your images nondestructively, work on a duplicate layer.
Select the Dodge Tool and choose a brush softness and size in the options bar. In the Range menu, you can select between Highlights, Midtones and Shadows. Selecting Highlights from the Range menu means the Dodge Tool will lighten the lighter areas of your images. Selecting midtones lightens the middle tonal range of your image and shadows lightens the darker areas. Opacity is the next option to change. When the opacity of the Dodge Tool is lower, it will be applied with less strength. When the opacity is at a high percentage, the Dodge Tool will be applied harsher. Tick the Protect Tones checkbox in order to minimise clipping in the shadows and highlights.
Once you have changed your settings, simply brush over the areas you want lightened in your image to see the Dodge Tool take effect. In the example image below, we used a large, soft brush with the Dodge Tool set to Midtowns, Opacity 20% and Protect Tones checked on.
We used the Dodge Tool to brush over the model’s face, arm and hair to brighten the portrait and bring attention to the centre of the image.
04. Burn Tool // The Burn Tool in Photoshop works to darken an area of your image. Just like the Dodge Tool, applying the Burn Tool to the original image layer permanently alters the image information. To use the Burn Tool on your images nondestructively, work on a duplicate layer.
Select the Burn Tool and choose a brush softness and size in the options bar. In the Range menu, you can select between Highlights, Midtones and Shadows. Selecting Highlights from the Range menu means the Burn Tool will darken the lighter areas of your images. Selecting midtones darkens the middle tonal range of your image and shadows darkens the darker areas. Opacity is the next option to change. When the opacity of the Burn Tool is lower, it will be applied with less strength. When the opacity is at a high percentage, the Burn Tool will be applied harsher. Tick the Protect Tones checkbox in order to minimise clipping in the shadows and highlights.
Once you have changed your settings, simply brush over the areas you want lightened in your image to see the Burn Tool take effect. See how the Burn Tool works in the example images below.
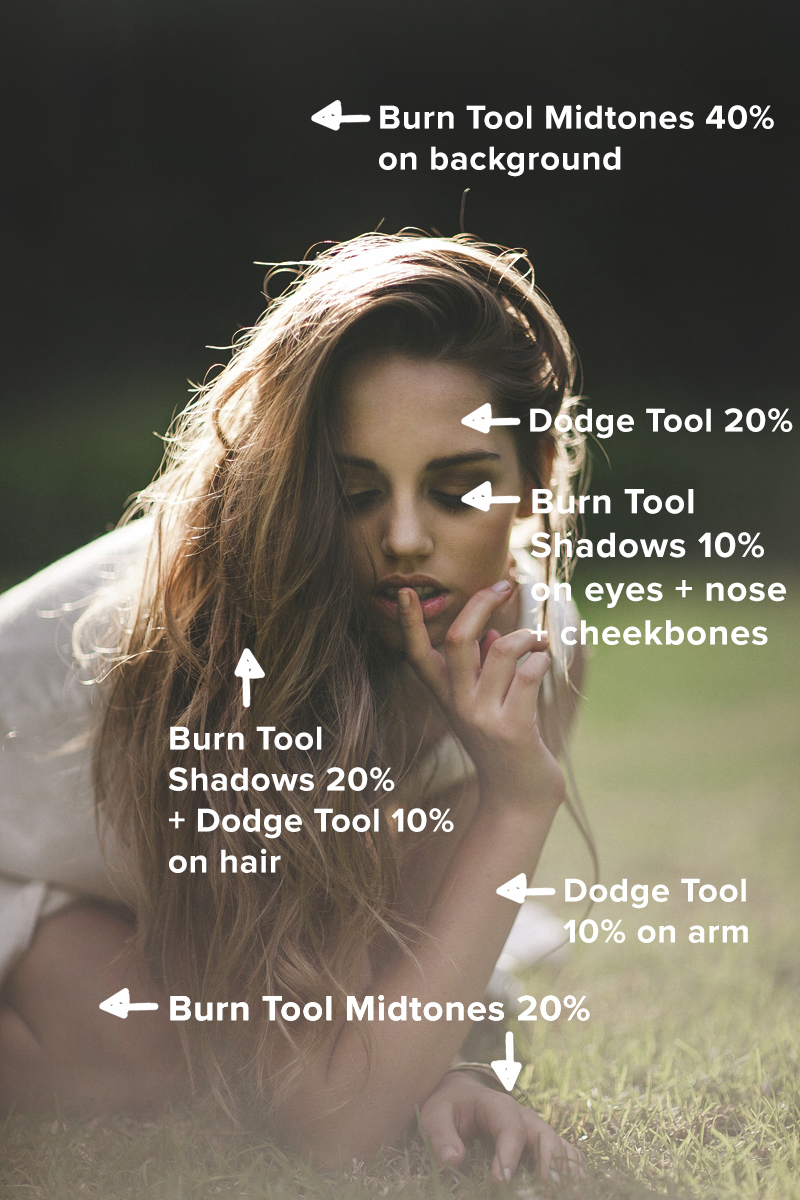
In the second example image, we used the Burn Tool with a large, soft brush set to Midtones, Opacity 20% and Protect Tones checked on. We brushed over any light part of the image, which results in a flat photo. This tool is handy to use when a part of the image is drawing the eye away because it is too bright. For example, we could use the Burn Tool on Midtones to bring down the brightness of the model’s leg in the bottom left hand corner of the image, as well as the hand that’s on the grass. With those two elements of the photo now darkened and in turn flatter, they blend into the rest of the photo drawing your eyes up the model’s arm and to her face. We also used the Burn Tool on the top background of the image, bringing down the blacks further to bring attention away from the background.
In the third example image, we used the Burn Tool with a large, soft brush set to Shadows, Opacity 10% and Protect Tones checked on. This time we brushed over areas of the image that we wanted to be darker. In this case, we brushed over her hair which brings out more of the texture, as well as brushing over a few features on the model’s face. As you can see, using the Burn Tool on Shadows actually brings out contrast in the image in contrast to the Burn Tool set to Midtones which flattens the image.
Below is an example of the image with both the Dodge and Burn Tool used in conjunction to bring out the best in the image.
One last tip when using the Dodge and Burn Tool is that sometimes when applying these tools, the colour in your images may start to be altered. In the above image while using Dodge and Burn on the model’s face, the orange tinge in her skin tone was being saturated. In order to avoid this happening, set your duplicate layer’s blend mode to Luminosity. This means that only the tone in your image will be altered rather than the colour.
As you can see from the above examples, using the Dodge and Burn Tool in Photoshop can really make the final emphasis needed on an image to make it stand out. While you can apply an overall colour tone in Lightroom, Photoshop has the tools needed to take further control over an image. You are able to hone in on specific parts of a photo, editing with as little or as much strength as you need to alter a specific section.

